Essential Tips and Equipment for Capturing Stunning Milky Way Photos in New Zealand
- Adrian Fong
- Sep 21, 2025
- 4 min read
New Zealand is blessed with some of the most stunning landscapes on the planet. When night falls, the skies transform into a breathtaking cosmic display. For many photographers, capturing the Milky Way is an exciting challenge. With the right equipment, some simple techniques, and a little preparation, you can create remarkable images that reveal the beauty of the night sky. In this article, we'll break down essential tips and advice for photographing the Milky Way in New Zealand, highlighting the necessary equipment and optimal camera settings.
Finding the Best Locations
The first step in your Milky Way photography journey is to select the right location. New Zealand features several dark sky reserves and national parks that offer exceptional views of the Milky Way. Here are a few top spots to consider:
Aoraki Mackenzie International Dark Sky Reserve: Renowned for its crystal-clear skies and low levels of light pollution, this area is a premier destination for astrophotography. The reserve covers about 4300 square kilometers, providing vast opportunities for capturing stunning celestial imagery.
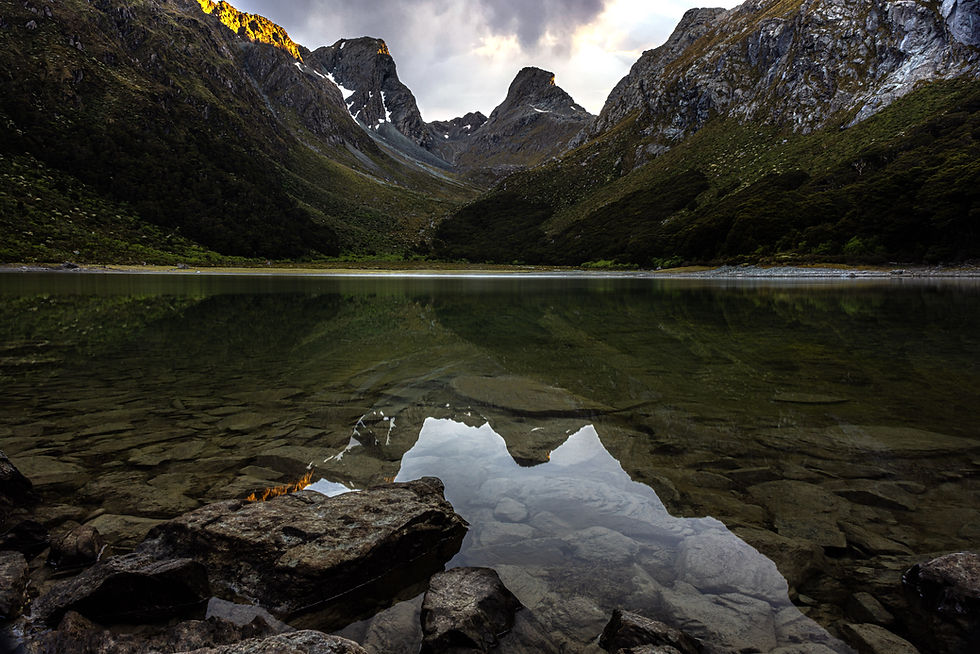
Fiordland National Park: This majestic location, known for its rugged landscapes and deep valleys, offers unique compositions for your Milky Way photos. The dramatic scenery creates striking contrasts against the starry sky.
Lake Tekapo: Recognized for its stunning turquoise waters and clear skies, Lake Tekapo is another outstanding location for Milky Way photography. The nearby Church of the Good Shepherd, lit by the night sky, adds a charming foreground element.
Plan to scout your chosen location during daylight hours. This allows you to find interesting foreground elements, such as trees or rock formations, which can enhance your photographs.

Key Equipment Needed
To capture breathtaking Milky Way images, you'll need specific equipment. Here’s a list of must-have items:
Camera: A DSLR or mirrorless camera with manual settings is ideal. Choose a model that excels in low-light conditions, such as the Canon EOS R6 or Sony A7 III.
Lens: A wide-angle lens (between 14mm and 24mm) with a large aperture (f/2.8 or wider) is crucial for maximizing light capture. For instance, the Sigma 14mm f/1.8 is a fantastic choice.
Tripod: A sturdy tripod is essential for stabilizing your camera during long exposures to prevent blurriness.
Remote Shutter Release: This tool can help prevent camera shake, especially important for longer shutter speeds.
Headlamp: A red light headlamp is perfect for moving around in the dark, allowing you to see without ruining your night vision.
Extra Batteries: Cold nighttime temperatures can quickly drain batteries. Bring extra batteries to ensure you’re prepared to shoot through the night.
Equipping yourself with the right gear can significantly improve the quality of your photographs.

Optimizing Camera Settings
Now that you’ve selected your location and gathered your equipment, it's time to set your camera. Here are some recommended settings to get started:
Mode: Set your camera to manual mode for complete control over the exposure settings.
Aperture: Use the widest available aperture (f/2.8 or wider) to let in the maximum amount of light.
ISO: Start with an ISO range between 1600 and 3200. Adjust this based on your camera’s performance and the ambient light conditions.
Shutter Speed: Use the 500 rule to determine your maximum shutter speed. Divide 500 by your lens's focal length. For example, with a 20mm lens, 500/20 equals 25 seconds.
Focus: Manually focus your lens to infinity. It’s often helpful to focus on a distant light or star before switching to manual focus to ensure sharpness.
White Balance: Set your white balance to around 3500K to 4000K for a warmer tone. Alternatively, shooting in RAW will allow you to adjust this during post-processing.
Feel free to experiment with these settings and fine-tune them to your liking based on conditions and your creative vision.
Getting the Timing Right
Timing plays a crucial role in astrophotography. The best times to capture the Milky Way are during new moon phases when the night sky is at its darkest. Also, keep an eye on the weather forecast to ensure clear skies. Apps like PhotoPills or Star Walk can aid in planning your shoot, providing guidance on the Milky Way’s position.
To maximize your chances of great shots, arrive at your location well before sunset. This way, you can set up your equipment and become familiar with your surroundings, allowing you to capture twilight shots before the stars twinkle to life.
Composing Your Shots
When composing your Milky Way photos, consider these strategies:
Add Foreground Interest: Include compelling foreground elements like trees, mountains, or water bodies to create depth in your images.
Use the Rule of Thirds: Position the horizon in either the lower third or upper third of the frame. This creates a more balanced composition.
Lead the Eye: Utilize natural lines in the landscape, such as rivers or trails, to guide the viewer’s eye toward the Milky Way.
Be Creative: The night sky offers endless possibilities. Experiment with different angles and perspectives for unique results.

Enhancing Your Images
Once you've captured your Milky Way photos, post-processing is where you can truly enhance your work. Use software like Adobe Lightroom or Photoshop with these tips:
Adjust Exposure: Fine-tune the exposure to highlight details in the Milky Way, bringing out the richness of the stars.
Increase Contrast: Boosting contrast helps the stars stand out against the darker sky, making your images pop.
Correct Colors: Adjust white balance and saturation to achieve the look you desire. Make use of color grading to add a personal touch.
Minimize Noise: Use noise reduction tools to suppress graininess, particularly if you used a higher ISO.
With practice, post-processing will allow you to turn good Milky Way photos into stunning masterpieces.
Final Thoughts
Capturing the Milky Way in New Zealand is a rewarding experience that combines the right equipment, settings, and creativity. By choosing the ideal location and mastering your camera settings, you can create breathtaking images that showcase the splendor of the cosmos. Remember, photography is about experimenting and enjoying the process. So grab your camera, head out into the wild, and start capturing unforgettable images!

Comments